As an Amazon Associate, I earn from qualifying purchases.
When it comes to woodworking, having a table saw is essential. However, to ensure precise and safe cutting, it’s important to regularly change the blade. In this article, we will guide you How to Change the Blade on a Table Saw, step by step, while emphasizing safety precautions and providing valuable tips.
Understanding the Importance of Changing the Blade
The blade on a table saw is subject to wear and tear over time. Dull or damaged blades can lead to inaccurate cuts, splintering, or even kickbacks, posing a risk to both the user and the workpiece. By changing the blade regularly, you can maintain the efficiency and safety of your table saw.
Safety Precautions Before Changing the Blade
Before diving into the blade-changing process, it’s crucial to prioritize safety. Ensure that the table saw is turned off and unplugged from the power source. Wear protective goggles, gloves, and ear protection to safeguard yourself from potential hazards. Additionally, work in a well-ventilated area to minimize the risk of dust inhalation.
Tools and Materials Required
To change the blade on a table saw, you’ll need a few tools and materials. These include a wrench or blade-changing tool provided with your saw, a replacement blade of the appropriate size and type, and a clean cloth or brush for removing debris.
Contents
Step-By-Step Guide To Changing The Blade
Step 1: Prepare The workspace
Begin by clearing the tabletop and ensuring there are no obstacles around the saw. This will provide a safe and clutter-free environment for the blade-changing process.
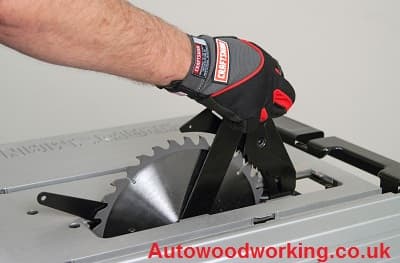
Step 2: Remove The Throat Plate
Gently remove the throat plate, which covers the gap between the tabletop and the blade. This will provide access to the blade and its mounting mechanism.
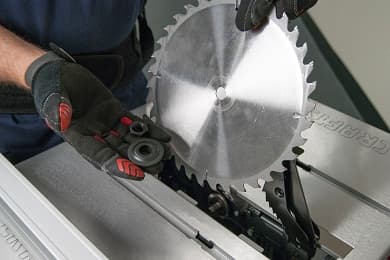
Step 3: Loosen The Arbor Nut
Using the wrench or blade-changing tool, loosen the arbor nut in a counterclockwise direction. Be sure to hold the blade in place to prevent it from spinning.
Step 4: Remove The Old Blade
Once the arbor nut is sufficiently loosened, carefully remove the old blade from the arbor, making note of its orientation for future reference.
Step 5: Clean The Arbor And Blade Area
Take a moment to clean the arbor and the surrounding area with a cloth or brush. This will remove any sawdust or debris that may have accumulated, ensuring a smooth installation of the new blade.
Step 6: Install The New Blade
Align the new blade with the arbor, ensuring that any directional arrows or markings on the blade match those on the saw. Once aligned, tighten the arbor nut securely in a clockwise direction.
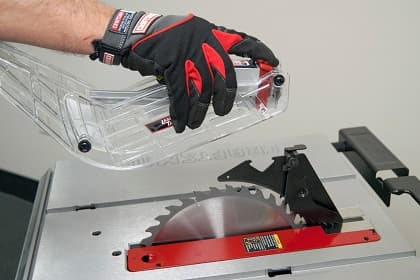
Step 7: Replace The Throat Plate
Carefully put the throat plate back in its original position, ensuring it sits flush with the tabletop. Double-check that there are no gaps or loose parts.
Tips For Smooth Blade Changing
- Always refer to the manufacturer’s instructions for your specific table saw model.
- Use the appropriate blade for the task at hand to achieve the best results.
- Regularly inspect the blade for any damage or signs of wear. Replace the blade if necessary.
- Keep the blade changing area clean to prevent debris from interfering with the installation process.
- Consider investing in a blade-changing tool if your table saw doesn’t come with one. It can make the process easier and safer.
Troubleshooting Common Issues
Sometimes, you may encounter difficulties or issues when changing the blade on your table saw. Here are a few troubleshooting tips:
- If the arbor nut is stuck or difficult to loosen, apply a penetrating oil to help loosen it. Be patient and avoid using excessive force, as it can damage the nut or the saw.
- If the blade doesn’t align properly with the arbor, double-check that you have the correct blade size and type. Make sure the blade is seated correctly and tighten the arbor nut securely.
- If you experience vibration or unusual noise after changing the blade, it could indicate an installation error or an issue with the new blade. Double-check the installation steps and ensure the blade is properly aligned and tightened.
Maintaining The Blade For Optimal Performance
To prolong the lifespan and performance of your table saw blade, it’s essential to practice proper maintenance. Here are a few tips:
- Clean the blade regularly using a blade cleaner or a mixture of water and mild detergent. This will remove sawdust, resin, and other debris that can affect the blade’s performance.
- Avoid cutting materials that can cause excessive wear or damage to the blade, such as metal or materials with embedded nails or screws.
- Store the blade in a dry and clean area to prevent corrosion or damage. Consider using a blade storage container or protective cover.
FAQs (Frequently Asked Questions)
How often should I change the blade on my table saw?
The frequency of blade changes depends on usage and the type of materials you cut. As a general guideline, consider changing the blade every 6 to 12 months or when you notice a decrease in cutting performance.
Can I use any blade on my table saw?
It’s crucial to use blades specifically designed for table saws. Different blades are suited for different materials and cutting tasks. Always refer to the manufacturer’s recommendations for the compatible blade types.
Can I sharpen a dull blade instead of replacing it?
While some blades can be sharpened, it’s often more cost-effective and efficient to replace them, especially if they are severely worn or damaged. Consult a professional sharpening service for guidance.
What should I do if the blade doesn’t spin freely after installation?
Check for any obstructions or misalignment between the blade and the arbor. Ensure the arbor nut is securely tightened but not overly tightened, as it can cause binding.
Is it necessary to wear protective gear when changing the blade?
Yes, it’s highly recommended to wear protective goggles, gloves, and ear protection when working with power tools, including changing the blade on a table saw. Safety should always be a priority.
Conclusion
Changing the blade on a table saw is a vital maintenance task that ensures accurate and safe cutting. By following the step-by-step guide and adhering to safety precautions, you can effectively change the blade and maintain the optimal performance of your table saw. Remember to prioritize safety, use the appropriate tools, and consult the manufacturer’s instructions for your specific model.


