As an Amazon Associate, I earn from qualifying purchases.
Welcome to this guide on how to make a router table specifically designed for a plunge router. If you’re an avid woodworker or a DIY enthusiast, having a router table can greatly enhance your woodworking projects. In this article, we will take you through the step-by-step process of building your own router table, providing you with the necessary instructions, tips, and safety guidelines to successfully complete this project.
What is a Router Table?
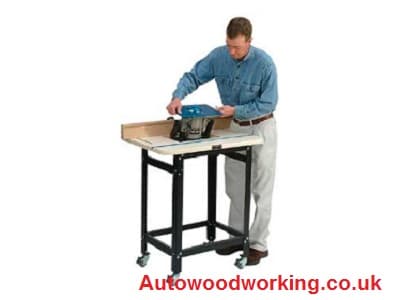
A router table is a woodworking tool that provides a stable and secure platform for a router. It allows you to perform a variety of tasks such as shaping edges, creating grooves, and cutting precise joinery. A router table offers improved control, accuracy, and safety compared to using a handheld router alone.
Benefits of a Router Table
Using a router table offers several benefits. Firstly, it provides a stable work surface, making it easier to handle your workpieces. It also enables you to make consistent and precise cuts, thanks to the added support and guidance provided by the table. Additionally, a router table allows for safer routing operations, reducing the risk of accidents and providing better control over the router.
Types of Router Tables
There are various types of router tables available, including benchtop, freestanding, and cabinet-style options. Benchtop router tables are compact and portable, making them suitable for small workshops or on-the-go woodworking. Freestanding tables offer more stability and workspace, while cabinet-style tables provide additional storage for router bits and accessories.
Materials and Tools Needed
Before you begin building your router table, gather the necessary materials and tools. You will need a sturdy workbench or table as the base, medium-density fiberboard (MDF) or plywood for the table surface, lumber for the fence and frame, screws or nails, a plunge router, a router lift or plate, safety goggles, a tape measure, a drill, and other common woodworking tools.
Contents
Building A Router Table

Step 1: Design And Planning
Begin by designing your router table and planning its dimensions. Consider the available space in your workshop and the size of your plunge router. Sketch out the layout and determine the required measurements.
Step 2: Selecting The Base
Choose a suitable workbench or table to serve as the base for your router table. Ensure it is sturdy and level to provide a stable foundation. Attach the MDF or plywood to the top surface of the base, securing it with screws or nails.
Step 3: Creating The Fence
Construct a fence that will guide your workpieces along the table. Use a straight piece of lumber and attach it securely to the back edge of the table. You can also add a dust collection port to the fence to minimize sawdust and debris.
Step 4: Mounting The Router
Install a router lift or plate onto the router table surface, following the manufacturer’s instructions. This will allow you to adjust the router’s height and change bits from above the table, saving you time and effort.
Step 5: Adding Accessories
To enhance the functionality of your router table, consider adding some useful accessories. One popular accessory is a miter gauge, which allows you to make angled cuts with precision. You can also install a featherboard to apply pressure and keep your workpiece securely in place during routing. Additionally, a router table extension wing can provide extra workspace for larger projects.
Step 6: Finishing Touches
Once the main components of your router table are in place, it’s time to add some finishing touches. Sand down any rough edges or surfaces to ensure a smooth and professional finish. Apply a protective coat of varnish or paint to the table and fence to protect them from moisture and wear.
Safety Tips
When working with routers and router tables, safety should be a top priority. Here are some important safety tips to keep in mind:
- Always wear safety goggles or glasses to protect your eyes from flying debris.
- Use push sticks or push blocks to keep your hands a safe distance from the router bit.
- Ensure the router is securely mounted and the bit is properly tightened.
- Disconnect the power before making any adjustments or changing router bits.
- Avoid feeding the workpiece too quickly into the router bit; maintain a steady and controlled pace.
Maintenance and Upkeep
To keep your router table in optimal condition and ensure its longevity, regular maintenance is essential. Clean the table surface and fence after each use to remove any sawdust or debris. Lubricate the router lift or plate mechanism as recommended by the manufacturer. Inspect the table for any signs of wear or damage and make any necessary repairs promptly.
FAQs (Frequently Asked Questions)
Can I use any type of router with a router table?
Yes, most routers can be used with a router table. However, ensure compatibility and consider the size and power of your router when designing your table.
Do I need professional woodworking skills to build a router table?
Basic woodworking skills are helpful, but with the right instructions and tools, even beginners can successfully build a router table.
Can I modify the design of the router table to suit my specific needs?
Absolutely! Feel free to customize the design and dimensions of your router table based on your workshop space and personal preferences.
Is a router table necessary for woodworking?
While not essential, a router table greatly expands the capabilities and safety of routing operations, making it a valuable addition to any woodworking setup.
Where can I find router table plans or additional resources?
There are many online sources and woodworking books that provide detailed router table plans and inspiration for building your own. Check reputable woodworking websites and forums for reliable information.
Conclusion
Congratulations! You have now learned how to make a router table for a plunge router. By following the step-by-step instructions provided in this article, you can create a functional and reliable router table that will enhance your woodworking projects. Remember to prioritize safety at all times and perform regular maintenance to prolong the lifespan of your router table. Enjoy the convenience and precision that a router table brings to your woodworking endeavors!


