As an Amazon Associate, I earn from qualifying purchases.
If you’re looking to repaint a room or refurbish an old piece of furniture, one of the first things you’ll need to do is remove any existing paint. Sanding is a popular and effective method for removing paint, but it can be tricky to do it correctly. In this article, we’ll guide you through the steps for using a sander to remove paint, including tips and tricks for getting the best results.
Contents
Why Use a Sander to Remove Paint?
A sander is an excellent tool for removing paint because it’s fast, efficient, and can work on large surfaces. It’s also ideal for removing paint from difficult-to-reach areas, such as corners and edges. While a sander can be noisy and messy, it’s still the best option for those who want to remove paint quickly and efficiently.
Removing paint can be a daunting task, especially if you have to do it manually. Using a sander can speed up the process and give you a smoother surface to work with. However, using a sander requires some basic knowledge and preparation. In this article, we’ll walk you through the steps of using a sander to remove paint from different surfaces, such as wood, metal, and walls.
Understanding Sanders

Types of Sanders
Sanders come in different shapes and sizes, each designed for specific purposes. Here are some of the most common types of sanders:
Belt sander: a powerful sander that uses a belt to remove paint, stain, and other coatings quickly. It’s best for large surfaces and heavy-duty tasks.
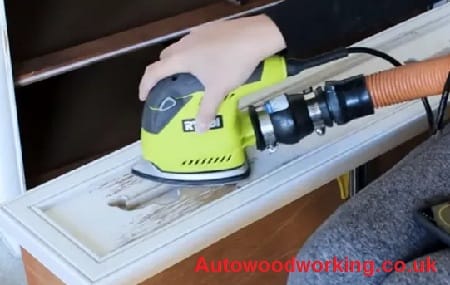
Orbital sander: a versatile sander that uses a round sandpaper disc to remove paint and other coatings. It’s best for sanding wood, metal, and plastic surfaces.
Random orbital sander: a more advanced version of the orbital sander that uses a circular sanding motion to reduce swirl marks and scratches.
Detail sander: a small sander that’s ideal for sanding tight spaces and corners. It uses a triangular sanding pad to remove paint and other coatings.
Handheld sander: a portable sander that’s best for small DIY projects and touch-ups. It’s lightweight and easy to use but may require more effort and time to remove paint.
Choosing the Right Sander for Your Project
Choosing the right sander for your project depends on several factors, such as the surface material, the size of the project, and your level of expertise. Generally, a belt sander is best for large and flat surfaces, while an orbital sander is ideal for smaller surfaces and tight spaces. A detail sander is best for intricate surfaces, while a handheld sander is suitable for small touch-ups and quick fixes.
Preparing For The Task
Safety Precautions
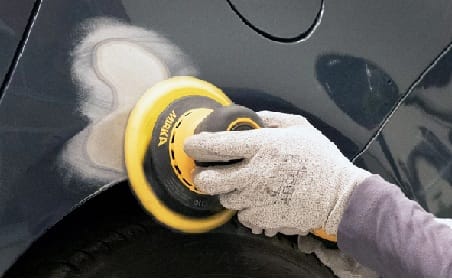
Before using a sander, it’s crucial to take the necessary safety precautions. Wear safety goggles, a dust mask, and earplugs to protect your eyes, lungs, and ears from dust and debris. Also, wear gloves to protect your hands from the sander’s vibrations and heat. Make sure to read the sander’s user manual and follow the manufacturer’s instructions for safe use.
Surface Preparation
Preparing the surface is essential for achieving the best results. Start by removing any loose or flaking paint with a scraper or putty knife. Then, clean the surface with a damp cloth or sponge to remove any dirt, grease, or grime. Let the surface dry completely before sanding.
Using The Sander To Remove Paint
Sandpaper Selection
Choosing the right sandpaper is crucial for effective paint removal. For removing paint, it’s best to use a coarse grit sandpaper, such as 60 or 80 grit. This grit size will help to remove the paint quickly without damaging the surface. You can use a finer grit sandpaper, such as 120 or 150 grit, for a smoother finish, but it will take more time and effort.
Sanding Techniques
Once you’ve selected the appropriate sandpaper, it’s time to start sanding. Here are some tips for effective sanding:
- Hold the sander firmly with both hands and turn it on.
- Start sanding in a corner or an inconspicuous area to test the grit and pressure.
- Move the sander back and forth in a straight line, following the wood grain or the surface contour.
- Apply moderate pressure on the sander but avoid pressing too hard, as it can damage the surface or cause swirl marks.
- Check the sandpaper frequently and replace it when it becomes clogged or worn out.
- Use a vacuum or a dust extractor to remove the dust and debris while sanding.
Common Mistakes to Avoid
Here are some common mistakes to avoid while using a sander:
- Sanding too much in one spot, which can create a depression or a hole.
- Using too much pressure on the sander, which can damage the surface or cause swirl marks.
- Not checking the sandpaper frequently, which can reduce its effectiveness and cause the sander to overheat.
- Using a sander on a wet or damp surface, which can damage the sander and create a risk of electrocution.
- Not wearing appropriate safety gear, which can cause injury or health
After The Task
Clean-up
After sanding, it’s essential to clean up the dust and debris. Use a vacuum cleaner or a damp cloth to remove any remaining dust, and make sure to dispose of it properly. Also, clean the sander and the sandpaper to prolong their lifespan.
Post-Sanding Surface Treatment
Once the surface is smooth and free of paint, you may want to apply a primer or a new coat of paint. This will protect the surface and give it a fresh look. Make sure to choose the right primer or paint for the surface material and follow the manufacturer’s instructions for best results.
Conclusion
Using a sander to remove paint can make the task easier, faster, and more efficient. However, it’s crucial to choose the right sander, take the necessary safety precautions, and follow the appropriate sanding techniques to achieve the best results. By following the tips and techniques outlined in this article, you can remove paint from your furniture, walls, or any other surface safely and efficiently.


