As an Amazon Associate, I earn from qualifying purchases.

Making your own fence for a table saw is a great way to ensure that the fence is perfectly tailored to your saw. It can also be a more affordable option than purchasing a pre-made fence. In this article, we will show you how to make a fence for a table saw.
Understanding the Importance of a Fence for a Table Saw
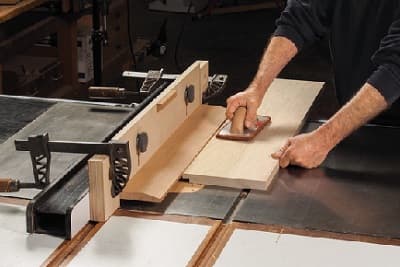
A fence acts as a guide to help you make straight and consistent cuts on your table saw. It provides support and stability to the workpiece, reducing the chances of errors and enhancing safety. With a proper fence, you can achieve precise measurements and improve the quality of your woodworking projects. Whether you’re cutting large sheets of plywood or small pieces of hardwood, a well-designed fence is essential for achieving clean, professional results.
Different Types of Fences for Table Saws
Before diving into the DIY approach, it’s important to understand the different types of fences available for table saws. Here are a few common options:
Standard T-Square Fence
The standard T-square fence usually comes with most table saws. It provides basic functionality and can be suitable for general woodworking tasks. However, it may lack certain features that enhance accuracy and ease of use.
T-Square Fence with Upgrades
Some manufacturers offer upgraded versions of the standard T-square fence. These upgrades can include features such as micro-adjustments, built-in measuring systems, and improved locking mechanisms. Upgraded T-square fences are designed to provide greater precision and convenience.
Aftermarket Fences
For those seeking more advanced features and increased accuracy, aftermarket fences are a popular choice. These fences are manufactured by third-party companies and are compatible with various table saw models. They often offer advanced features like precision scales, fine-adjustment knobs, and sturdy construction for improved stability.
DIY Fence Solutions
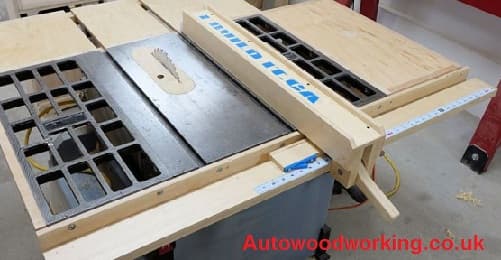
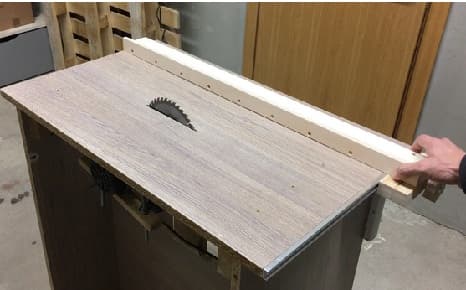
If you enjoy woodworking projects and want a customized fence tailored to your specific needs, making a DIY fence is a great option. It allows you to create a fence that matches your table saw perfectly and incorporates the features you desire.
Contents
Choosing The Right Fence For Your Table Saw

When it comes to selecting a fence for your table saw, making the right choice is crucial. The fence plays a significant role in the accuracy and precision of your cuts, so it’s important to consider several factors before making a decision. Here are some key considerations to keep in mind:
Accuracy and Precision
One of the primary functions of a table saw fence is to provide precise and accurate cuts. Look for a fence that has a reputation for maintaining consistent measurements and ensuring parallelism with the saw blade. The accuracy of your fence directly impacts the quality of your woodworking projects, so prioritize this aspect during your selection process.
Fence Length and Stability
The length of the fence is another critical factor to consider. A longer fence allows you to handle larger workpieces and provides more support throughout the cut. Additionally, a longer fence enhances the overall stability of the workpiece, reducing the risk of vibrations or inaccuracies during the cutting process. Assess the size of your typical projects and choose a fence length that suits your needs.
Ease of Installation and Adjustability
Consider the installation process of the fence and whether it aligns with your skill level and comfort. Some fences may require professional installation, while others offer a user-friendly setup that you can handle on your own. Also, ensure that the fence allows for easy adjustments and fine-tuning. The ability to make precise adjustments to the fence position and alignment is invaluable for achieving accurate cuts consistently.
Build Quality and Durability
Investing in a high-quality fence ensures longevity and durability. Look for fences made from robust materials such as aluminum or steel that can withstand the demands of woodworking tasks. A sturdy and well-built fence will maintain its performance over time, providing reliable support and accuracy for your projects.
Compatibility with Your Table Saw
Ensure that the fence you choose is compatible with your specific table saw model. Consider factors such as the mounting system and the overall design. Some fences are designed to be universally compatible, while others are specifically tailored to certain table saw models. Research the compatibility details provided by the manufacturer to ensure a seamless fit.
Step-By-Step Guide: Making A DIY Fence For A Table Saw

Materials and tools required
Before you begin making your DIY fence, gather the necessary materials and tools. Here’s what you’ll need:
- Measuring tape
- Straight edge or ruler
- Plywood or hardwood board for the fence face
- Aluminum extrusion or steel angle for the rails
- Screws or bolts
- Drill and drill bits
- Screwdriver or wrench
- Clamps
Measuring and cutting the fence rails
Start by measuring the length of your table saw’s tabletop. This will determine the length of the fence rails. Cut the aluminum extrusion or steel angle to the desired length using a saw or a hacksaw.
Preparing the fence face and auxiliary fence
Next, prepare the fence face. Cut a piece of plywood or hardwood board to the desired width and height of your fence face. Sand the edges to ensure a smooth finish.
To improve the performance of your fence, you can also create an auxiliary fence. This additional piece attaches to the front of the fence face, providing added support for taller workpieces.
Attaching the rails and fence face
Position the rails on the tabletop, ensuring they are parallel to the saw blade. Use clamps to hold them securely in place. Mark the locations for screw or bolt holes on the rails.
Drill pilot holes through the rails and into the tabletop. Attach the rails to the tabletop using screws or bolts, ensuring they are firmly secured.
Place the fence face against the rails, aligning it with the front edge of the tabletop. Mark the locations for screw or bolt holes on the fence face.
Drill pilot holes through the fence face and into the rails. Attach the fence face to the rails using screws or bolts, making sure it is flush and securely fastened.
Fine-tuning and aligning the fence
After attaching the fence face, check its alignment with the saw blade. Use a straight edge or ruler to ensure the fence is parallel to the blade along its entire length. Make any necessary adjustments to achieve perfect alignment.
Adding accessories and enhancements
To enhance the functionality of your DIY fence, consider adding accessories. You can attach a measuring tape or a digital readout system for precise measurements. Additionally, you can incorporate a sacrificial fence or replaceable inserts to protect the fence face and prevent tear-out during cuts.
Remember to regularly inspect and maintain your DIY fence to ensure its performance and longevity. Keep it clean and lubricated, and periodically check for any signs of wear or misalignment.
Maintenance And Safety Tips For Table Saw Fences
Regular cleaning and lubrication
To keep your table saw fence in optimal condition, it’s important to clean it regularly. Remove any sawdust or debris that may accumulate on the fence face and rails. Additionally, lubricate the moving parts of the fence, such as the locking mechanism, to ensure smooth operation.
Ensuring proper alignment and calibration
Check the alignment of your fence periodically to ensure it remains parallel to the saw blade. Use a reliable straight edge or a precision square to verify its alignment. If you notice any misalignment, make the necessary adjustments to restore accuracy.
Using safety features and accessories
Table saws can be dangerous tools, so it’s essential to prioritize safety when using a fence. Always follow proper safety procedures, such as wearing safety goggles and using a push stick or push block when necessary. Additionally, consider using featherboards or hold-down clamps to secure the workpiece and prevent kickback.
FAQs
Can I use any type of material for making a DIY fence?
While plywood or hardwood boards are commonly used, you can choose other suitable materials based on your preferences and availability.
How do I ensure the accuracy of my DIY fence?
Double-check your measurements, use precise cutting tools, and verify alignment with a straight edge or precision square.
Can I make adjustments to my DIY fence after installation?
Yes, you can fine-tune and align your fence as needed to ensure optimal accuracy and performance.
Are aftermarket fences worth the investment?
Aftermarket fences can offer advanced features and increased accuracy, making them a worthwhile investment for serious woodworkers.
How often should I clean and lubricate my table saw fence?
Regular cleaning and lubrication are recommended as part of your maintenance routine, ideally after every few uses or whenever sawdust accumulates.
Conclusion
In conclusion, having a reliable and well-designed fence for your table saw is essential for achieving precise and safe cuts in your woodworking projects. While there are various options available, including standard T-square fences, upgraded versions, aftermarket fences, and DIY solutions, the choice ultimately depends on your specific needs and preferences.
If you decide to make a DIY fence, follow the step-by-step guide provided in this article. Ensure accurate measurements, sturdy construction, and proper alignment to achieve optimal results. Regular maintenance, such as cleaning, lubrication, and alignment checks, will help prolong the life and performance of your fence.
Remember to prioritize safety when working with a table saw. Adhere to safety guidelines, use appropriate safety equipment, and familiarize yourself with the correct techniques for using the fence effectively.
By investing time and effort into creating or selecting the right fence for your table saw, you can elevate your woodworking skills and achieve consistent, high-quality results in your projects.


